Open a ticket with support to get the firmware and tools.
Jump to:
IC-100P-AA1 IC-156P-AA2 IC-215P-AA2 MP-000-AA2
Prepare Windows PC - Installing ADB driver:
-
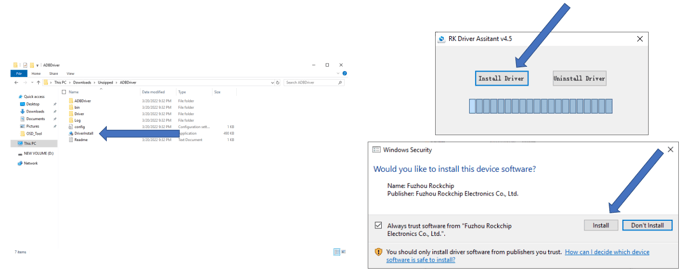
Navigate to the unzipped ADBDriver location and execute “DriverInstall.exe”. On Windows 10 you may need to select “Install Anyway” if Defender is active.
-
Select “Install Driver” from the RK Driver Assistant window.
-
Select “Install” from the Windows Security window.
-
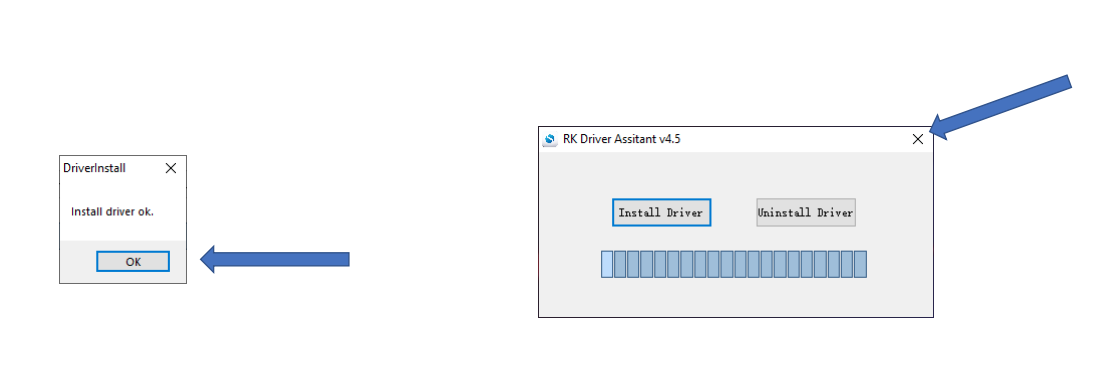
Once you see Install Driver Ok – The driver has been successfully installed. Select “OK”
-
On the RK Driver Assistant window – Select “x” to end the process.
Accessing the Recovery Button based on your model:
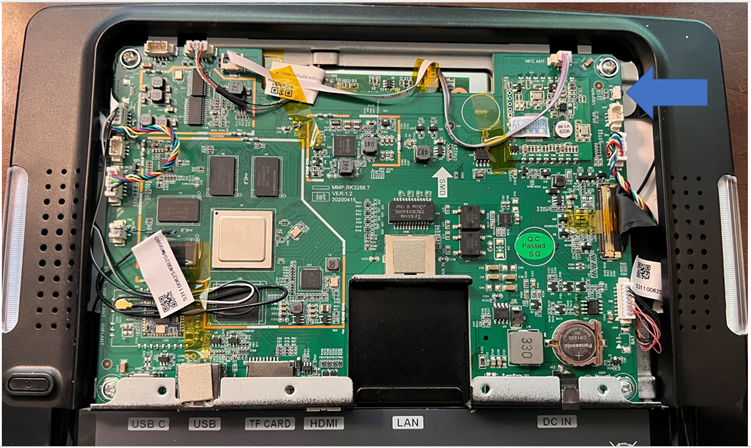
- IC-156P-AA2 & IC-215P-AA2
-
On the Android Device –Remove the Cable Cover (A) and the two screws holding on the back cover (B) to expose the main board.
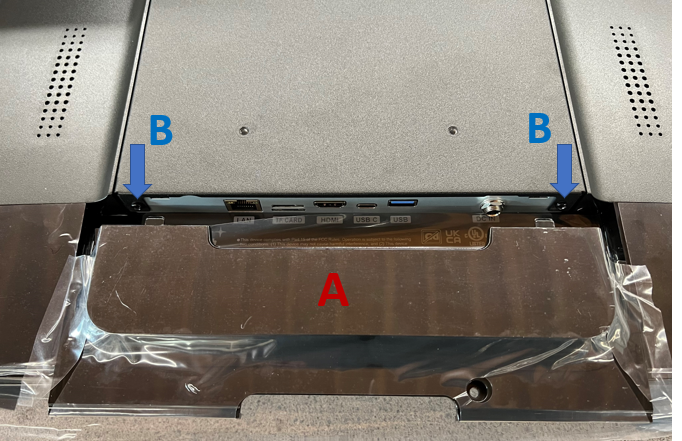
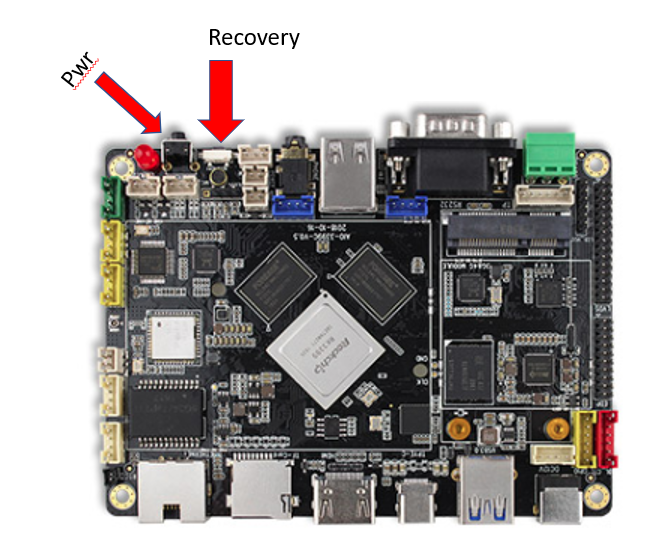
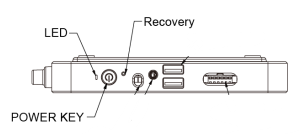
- Press and hold the recovery button while applying power to the MicroTouch device. The recovery button is the 2nd smaller button.
-
-
-
This should put the device in LOADER mode - as shown in Launching the Flashing tool section below.
-
- IC-100P-AA1
-
On the Android Device –Remove the four screws holding on the back cover to expose the main board.
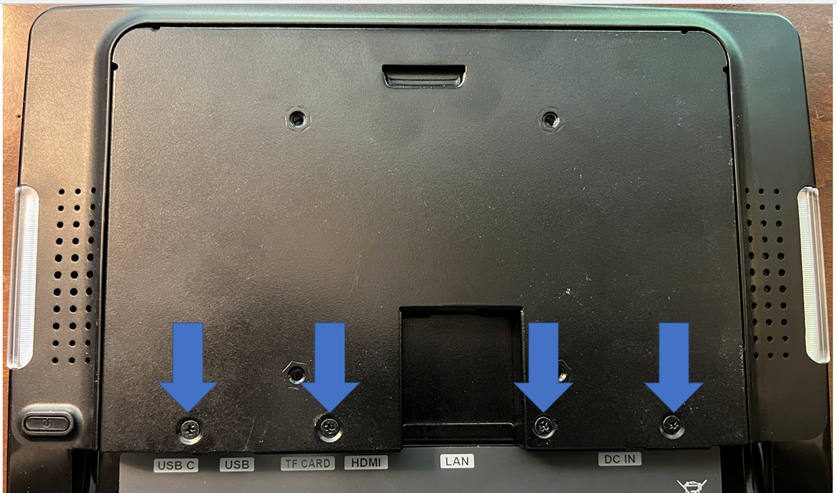
- Press and hold the recovery button while applying power to the MicroTouch device.
- This should put the device in LOADER mode - as shown in Launching the Flashing tool section below.
-
- MP-000-AA2
-
On the Android Device –Insert a paperclip or small round object into the recovery hole and hold the recovery button while applying power to the MicroTouch device.
- This should put the device in LOADER mode - as shown in Launching the Flashing tool section below.
-
Launching the Flashing tool:
If you have not yet loaded the ADB driver, please see here.
-
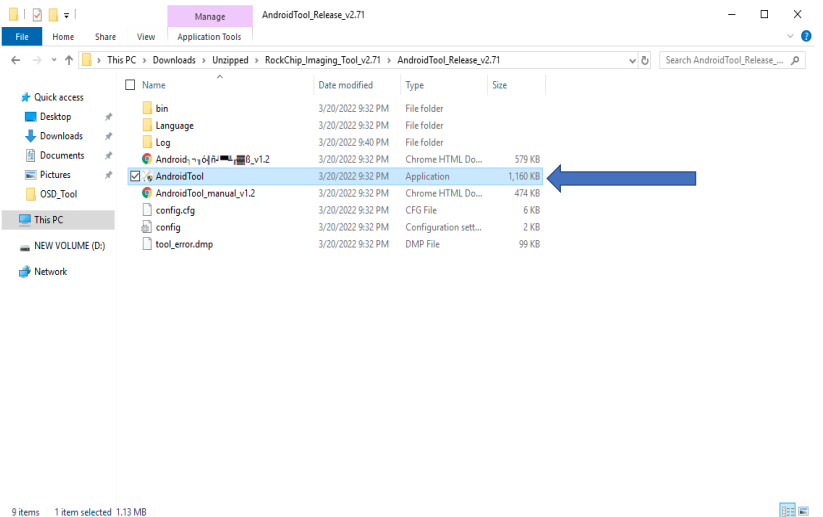
Navigate to the unzipped RockChip_Imaging_tool and launch the AndroidTool application.
-
With the Android Tool launched. Connect the USB-C port of the MicroTouch Android device to a USB port on the Windows Device.
-
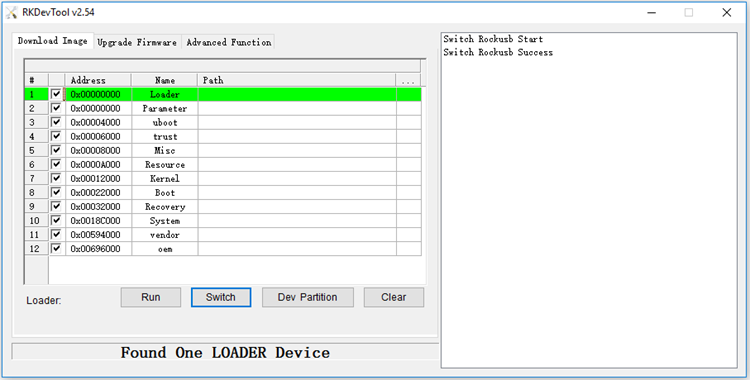
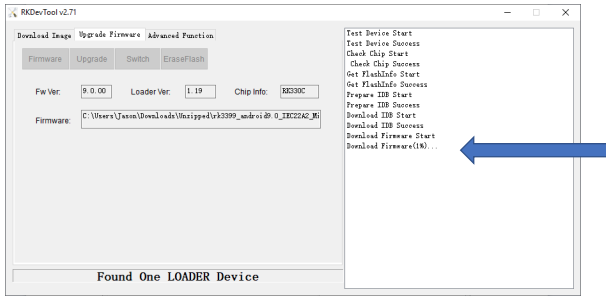
Once done, you will see “Found One LOADER Device” in the tool.
(If it says "No Devices Found" remove power from the device. Press and hold the recovery button while connecting the power cable to the unit. After about two seconds release the recovery button.)
-
Device. - The Android device is now ready to accept new Firmware.
Loading the image file:
-
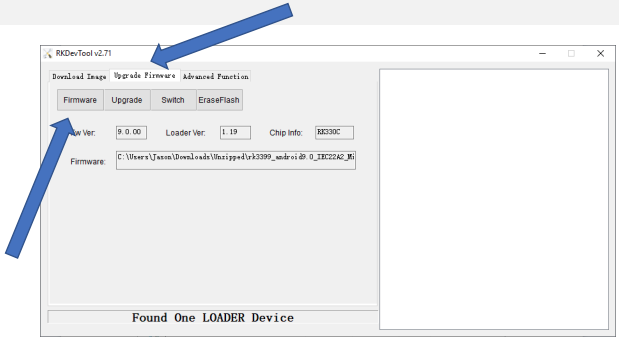
Click the “Upgrade Firmware” tab.
-
Click the “Firmware” Button.
-
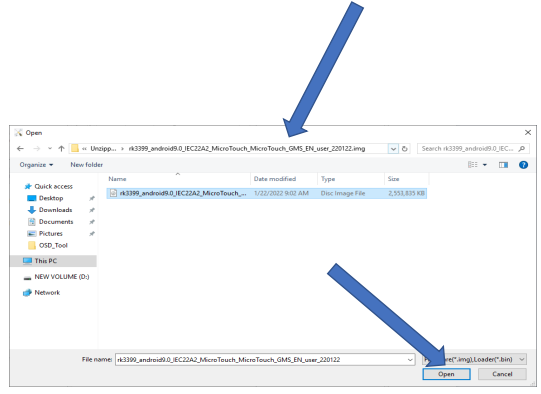
Navigate to the location where you have downloaded the .img file.
-
Select the file, then click “Open”.
Flashing the FW:
-
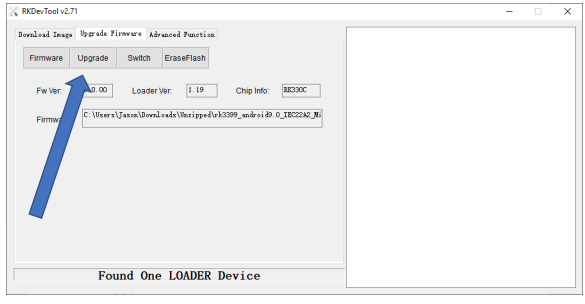
Click “Upgrade”
-
The Process will begin.
-
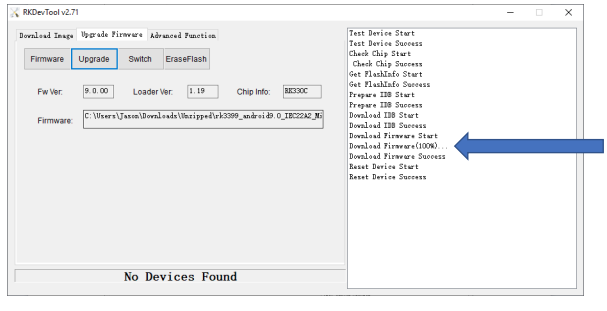
There is a progress counter.
Finishing up install:
-
The FW install will take several minuets and the Android Device will reboot.
-
You will see “Erasing” on the Android Device.
-
Once finished the Android device will boot into Android
-
The Android device will also re-enumerate as an MTP device
-
You can now disconnect the Windows PC and reassemble the MicroTouch Device.

If you have question, or additional information, please reach out to our support team - Details below:
Sign up for our Customer Portal. The portal provide a home base for your to interact with MicroTouch support and services teams. It gives your a secure place to track and manage all open and closed support tickets—or file a new ticket—so that you move issues along at your own pace, see ticket activity and be reassured that your problems are being addressed. The portal also provides the most efficient method to initiate an RMA.
Launch a Ticket with our technical resource center. The center is here to support you M-F, 8 AM to 5 PM EST.